
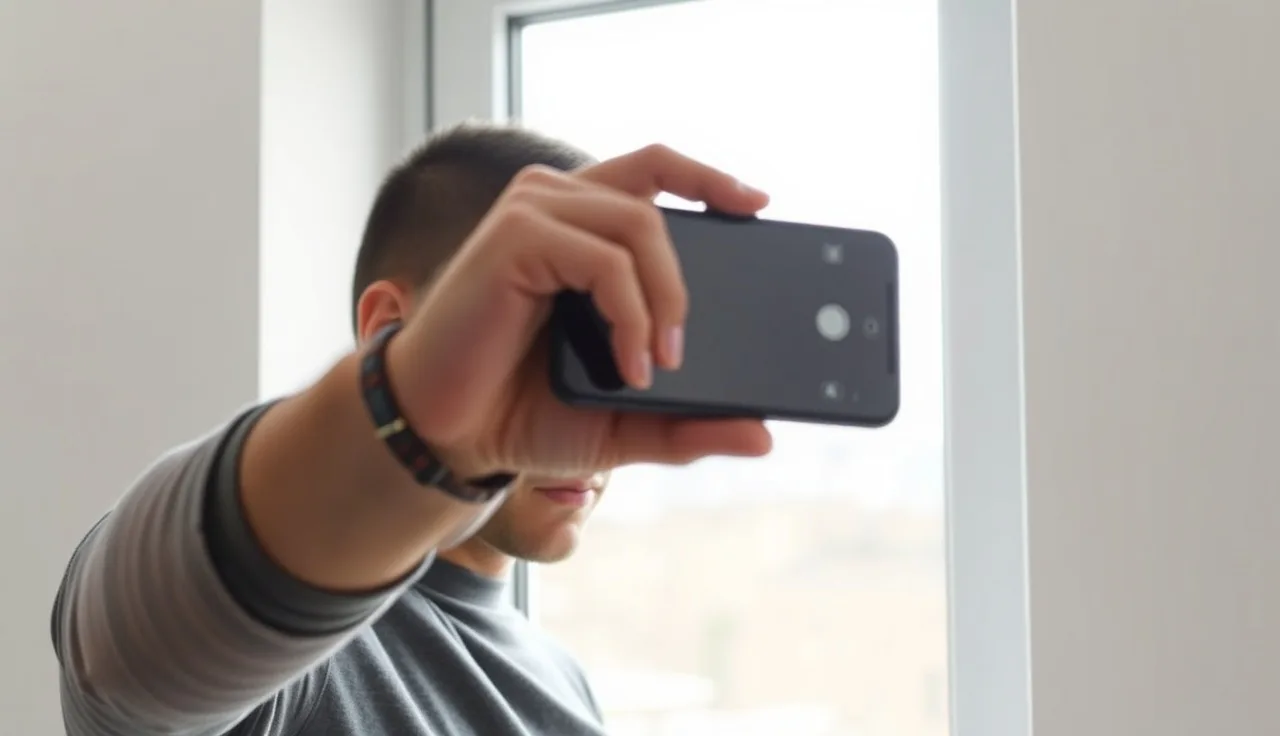
TL;DR: To track hair loss reliably, photograph your hairline from four fixed angles (front, both temples, top-down) in the same natural light, same spot, same hour of day, every four to eight weeks. Consistent conditions matter more than camera quality. Without a protocol, most people either panic over normal variation or miss real change entirely.
Why does consistent hairline photography actually matter?
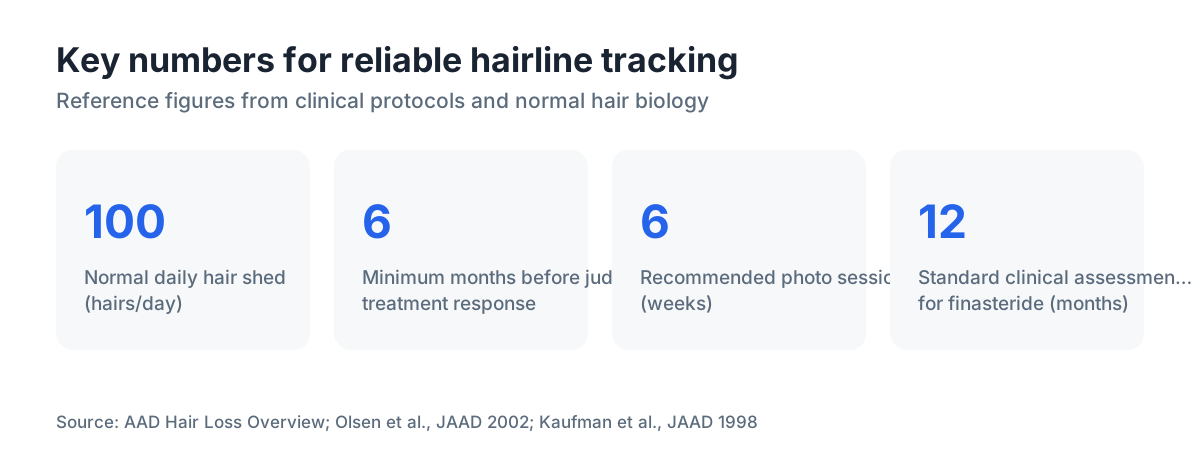
Hair loss is slow. The average human scalp loses 50 to 100 hairs per day through normal shedding, and even accelerated androgenetic alopecia recedes at a pace that is nearly invisible week to week [1]. That slowness is a trap. You look in the mirror every morning and you genuinely cannot see the change, so you either convince yourself nothing is happening or you have a bad anxiety day and convince yourself everything is falling out overnight.
Photography fixes this by creating an objective baseline. A photo from six months ago does not lie, does not have a bad day, and does not care whether you slept well. But a photo only counts as evidence if it was taken under the same conditions as the one you are comparing it to. Change the light source, tilt your head three degrees differently, shoot after a shower instead of before, and you have created a comparison that proves nothing. Dermatologists who run clinical trials on minoxidil and finasteride use standardized macrophotography protocols precisely because informal self-photos produce too much noise to detect real signal [2].
You do not need clinical equipment. You need a repeatable personal protocol. Getting that right takes about fifteen minutes to set up once, then two to three minutes per session after that.
What camera do you actually need for tracking hair loss?
A modern smartphone is enough. Research on trichoscopy and at-home hair monitoring shows that smartphone rear cameras above 12 megapixels can detect changes in hair shaft caliber and density that are clinically meaningful, especially when lighting is controlled [3]. You are not counting individual hairs. You are watching whether the zone of your temples, the hairline arc, or the crown is shifting.
A few practical points on gear:
Rear camera, not selfie camera. The front-facing camera on most phones has a wider, more distorting lens. Use the main rear camera. For overhead crown shots you will need a second person or a tripod with a timer.
No portrait mode for tracking. Portrait mode applies computational blurring to the background, which can obscure hairline edge definition. Shoot in standard photo mode.
Resolution consistency. Pick a resolution setting and stick to it. If you upgrade your phone mid-tracking period, take a matched set of comparison shots on both devices the same day so you know what changed.
Dedicated tracking folder. Create one folder in your photos app named something like "hairline log" and put every session there. Mixed into your general camera roll, they are nearly impossible to retrieve six months later.
A DSLR or mirrorless camera gives you more control over aperture and focal length, which reduces depth-of-field variation, but the extra benefit over a good smartphone is small for most people. Spend your effort on the protocol, not the hardware.
Which angles should you photograph for a complete hairline record?
Clinical hairline protocols used in trials for topical and oral therapies typically cover four to six standardized views [2]. For personal tracking, four angles catch almost everything you need to see.
| Angle | What it shows | How to position |
|---|---|---|
| Front straight-on | Overall hairline arc, symmetry, M-shape emergence | Camera at eye level, chin parallel to floor, eyes looking straight at lens |
| Left temple (45°) | Left temporal recession, hairline corner | Turn head 45° left, camera still at eye level |
| Right temple (45°) | Right temporal recession, hairline corner | Turn head 45° right, camera still at eye level |
| Top-down (overhead) | Crown thinning, vertex, part width | Camera directly above, pointing straight down at top of head |
If you are tracking a receding hairline specifically, pay extra attention to the 45-degree temple shots. The temples usually recede before the frontal hairline moves, and that corner progression is the earliest visible sign of Norwood stage advancement [4]. A widening part or diffuse thinning at the crown with no hairline change might point toward something like telogen effluvium rather than androgenetic alopecia, and the overhead shot will show that clearly.
Some people add a fifth shot: a close-up straight-on of just the hairline edge, camera about 30 centimeters from the scalp. This catches miniaturization at the hairline border that wider shots miss. It is harder to standardize but worth adding if you are in early stages where the change is subtle.
How should you set up your lighting so photos are actually comparable?
Lighting is where most home tracking protocols fall apart. A photo taken near a window on a sunny afternoon looks nothing like the same hairline photographed under warm bathroom bulbs at night. Shadows create the illusion of thinner hair. Bright overexposure flattens scalp contrast and makes hair look denser. Neither reflects reality.
The most reliable option is consistent indirect natural daylight. Stand facing a window on a cloudy day, or at a time when direct sun is not hitting the glass. Overcast light is diffuse, so it does not throw the harsh scalp shadows that make hair look sparse. Morning beats late afternoon slightly, because the angle of natural light tends to be more consistent day to day.
If you cannot count on natural light (apartment faces the wrong direction, you only shoot indoors, your schedule does not allow morning sessions), use two identical artificial light sources at 45 degrees to either side of your face, at face height. Ring lights sound appealing but they produce a very flat, direct light that can obscure hairline edge definition. Two simple daylight-balanced LED bulbs (5000K to 6500K color temperature) on either side work better.
Turn off every other light source in the room when you shoot. Mixed light is the enemy of consistency. Your bathroom ceiling light combined with a window creates a different mixture every hour and every season.
A simple checklist to laminate or pin near your shooting spot:
- Same room, same wall, same time of day
- Same light sources on, all others off
- Camera same distance from face (measure and tape-mark the floor)
- Dry hair, same style, no product if possible
How often should you take hairline progress photos?
Every four to eight weeks is the right frequency for most people. Androgenetic alopecia moves slowly enough that weekly photos give you almost no useful signal and plenty of anxiety-inducing noise from day-to-day changes in styling, scalp oiliness, and lighting [1]. Six weeks is a reasonable default.
If you are just starting a treatment like minoxidil for men or finasteride, the first three to six months often bring shedding before regrowth, so photos during that window can look alarming even when the treatment is working exactly as expected. Shooting every four weeks during the first six months of a new treatment lets you document that shed-and-regrow cycle without getting tripped up by the noise of weekly sessions.
For people using finasteride and minoxidil together, clinical trials typically assess outcomes at three months, six months, and twelve months [2]. Matching your own photo sessions to those checkpoints makes it easier to compare your results against published data.
Set a recurring calendar reminder. The single biggest reason personal tracking fails is that sessions drift: you shoot at week one, week three, week nine, week fourteen, and then you cannot tell whether the gap itself is causing the apparent change. Pick a day of the month and make it hairline photo day.
What else do you need to record alongside each photo?
A photo without metadata is worth far less. Each session should have a simple log entry that takes thirty seconds to fill in. Keep it in a notes app, a spreadsheet, or a paper notebook.
Record at minimum:
- Date
- Current treatments and doses (e.g., minoxidil 5% foam once daily, finasteride 1mg daily)
- How long you have been on each treatment
- Any recent changes (started a new medication, unusual stress, illness, dietary change)
- Hair condition notes (freshly washed, day-old styling, product in hair)
That last point matters more than people expect. A photo taken with two-day-old dry shampoo in your hair looks different from one taken with freshly air-dried hair, even at the identical hairline. Standardize your hair condition for photos: air-dried after washing, no product, hair in its natural default direction. If your natural part is on the left, part it left every time.
Changes in medications and stress are worth logging because what causes hair loss is genuinely multi-factorial. If you have a shed at month four and your log shows you started a new medication at month three, that is useful information. Without the log you have a scary photo and no context.
How do you use your photos to actually detect real change vs. noise?
The most common mistake is comparing your newest photo only to the one right before it. Instead, compare current photos to your baseline set, your three-month set, and your six-month set all at once. Single-step comparisons amplify noise. Multi-point comparisons reveal trends.
A few concrete things to look for:
Hairline position. In the front and 45-degree shots, find a fixed reference point (a mole, the outer corner of an eyebrow, the top of an ear) and note where the hairline sits relative to it across sessions. If the hairline moves consistently backward relative to that stable marker across three or more sessions, that is signal, not noise.
Part width. In the overhead shot, the width of the part (the white scalp visible between hair on either side) is a rough proxy for vertex density. A widening part over six to twelve months suggests thinning at the crown.
Temple corners. Early receding hairline changes almost always appear first at the temples. Compare the sharpness and fill of the corners across your 45-degree shots.
Miniaturization zone. At the very edge of a receding hairline, hair shafts get thinner and shorter before they disappear. In a close-up shot this shows as a soft, vellus-like fringe at the border. If that fringe is widening over time, the hairline is actively receding.
If you want a second opinion on what you are seeing, the free AI scan at MyHairline can analyze hairline photos and return a Norwood stage estimate, a useful external reference point alongside your own tracking.
And if you are genuinely unsure whether the change is real, a dermatologist can do a trichoscopy or pull test to give you objective data. Photos are a complement to professional evaluation, not a replacement.
How do you standardize the distance and framing for every shot?
Distance is the most underrated variable. Move six inches closer to the camera and the hairline looks higher and wider. Move six inches back and it looks lower and narrower. This is basic lens perspective, and it will make perfectly stable hair look like it has receded or grown, depending on which way you drifted.
The fix is physical: put a piece of tape on the floor. Measure a fixed distance from the wall you use as a background and mark it. For front and 45-degree shots, 60 to 90 centimeters from the camera works well with most phone main lenses. For overhead shots, whoever holds the camera should keep the phone at a fixed height (arm fully extended straight up is roughly consistent enough).
For framing, get the top of the head and the upper chest or collarbone both in frame for the front shot. That gives you enough context to see if you have shifted forward or back. Crop photos the same way if you want a smaller version, but keep the originals uncropped.
Some people stick a note on a mirror as a framing guide: they line up their nose with the note in the mirror reflection, which is a surprisingly effective low-tech trick for front-facing shots.
Can you use scalp marks or reference tattoos to improve accuracy?
A small number of people and some clinical researchers use ink dots or cosmetic tattoos as permanent fiducial markers for long-term hair density studies. This is real, it does improve measurement accuracy, and it is almost certainly more precision than personal tracking needs.
A much simpler version of the same idea: use existing markers. Everyone has a few stable reference points. The outer corner of the eyebrow barely moves over years. A mole or freckle on the scalp or forehead is fixed. A childhood scar is not going anywhere. Identify two or three of these in your baseline photos and note them. Then in each session, check that those markers sit in the same relative spot in the frame. If they do, your framing is consistent.
This is also why you should not zoom in hard on front-facing shots. A wider field of view captures more of those markers and makes framing drift easier to spot and correct.
Does hair length, color, or texture affect how well photos show thinning?
Yes, a lot. Short hair shows scalp more readily, which makes thinning more visible in photos but also makes the scalp look exposed even when density is stable. Long hair hides the scalp surface and can make moderate thinning nearly invisible in a photograph even when it is clinically significant.
Dark hair on light skin gives the most contrast and the most information-rich photos. Light or blonde hair on fair skin is harder to read because the contrast between hair and scalp is lower. If you have light hair, overhead flash photography (which you would normally avoid) can sometimes help, because the flash creates contrast shadows that make individual hairs more visible.
For people with tightly coiled or naturally voluminous hair, overhead crown shots matter most, because frontal appearance changes very little until density loss is quite advanced. The overhead shot looking straight down at the vertex captures center-part width and crown thinning that simply does not show from the front.
Texture and styling interact too. Dry hair tends to show more scalp than wet or conditioned hair because it lies flatter and more separated. For the most consistency, shoot within two hours of washing, after the hair is fully air-dried, with no product. That is the condition where hair behaves most similarly session to session.
What are the best apps and tools for organizing and comparing hairline photos?
You do not need a dedicated app. A dated folder in your phone's photos app, named by year and month, is genuinely enough and survives phone upgrades better than most specialized apps.
A few tools are worth knowing about:
Side-by-side comparison apps. Any app that puts two photos side by side on screen (many basic photo editors do this) helps you compare current and baseline shots. The native "Compare" view in some iOS and Google Photos apps works well.
Grid/collage apps. Making a 2x4 grid of your front-on shots across eight months is one of the clearest ways to see a trend at a glance. A simple photo collage app does this in a few taps.
Cloud backup. Whatever you do, back up to the cloud. Losing six months of baseline photos because you dropped your phone is genuinely painful. Photos used for medical tracking should be backed up the same day they are taken.
For people who want AI-assisted analysis instead of doing it themselves, the MyHairline scan tool accepts uploaded photos and returns a Norwood stage estimate. This is most useful at your baseline session and at six-month intervals, as a sanity check on your own read.
For anyone tracking a possible DHT blocker response or watching for minoxidil side effects, a dated photographic record is also useful context if you eventually see a dermatologist. Clinicians consistently say patient-provided sequential photos are one of the most useful things someone can bring to a hair loss consultation [10].
When should you show your hairline photos to a doctor?
Bring your photos to a dermatologist any time you think you are seeing real change and want an expert read. A good sequential set is far more useful to a clinician than your verbal description of what you think you saw. Dermatologists can assess the photos alongside a physical trichoscopy exam and pull test to confirm whether what you see is androgenetic alopecia, telogen effluvium, or something else.
Specific situations where photos matter most:
You are starting or considering a prescription treatment like finasteride and want a documented baseline before you begin, so you can judge whether the drug is actually working at three and six months.
You are shedding rapidly and want to rule out acute causes. Conditions like telogen effluvium can cause dramatic-looking shed phases that are temporary, and photos of your pre-shed density can reassure both you and your doctor that density was normal before the trigger event.
You are considering a hair transplant consultation. Surgeons want to know how fast your native hair loss is progressing before they plan a procedure. A two-year photo series showing slow, stable recession is very different from one showing rapid progression over six months, and it changes what they will recommend.
The American Academy of Dermatology recommends seeing a board-certified dermatologist for hair loss evaluation, especially when loss seems rapid or patchy [5]. Photos do not replace that evaluation. They make it better.
Sources
- American Academy of Dermatology, Hair Loss: Overview
- Olsen EA et al., J Am Acad Dermatol 2002, 'Global photographs as a standardized evaluation method for androgenetic alopecia clinical trials'
- Kibar M et al., Skin Appendage Disorders 2016, 'Trichoscopy and smartphone dermoscopy in hair and scalp disorders'
- Norwood OT, J Invest Dermatol 1975, 'Male pattern baldness: Classification and incidence'
- American Academy of Dermatology, Hair Loss: Diagnosis and Treatment
- Kaufman KD et al., J Am Acad Dermatol 1998, 'Finasteride in the treatment of men with androgenetic alopecia'
- MedlinePlus, U.S. National Library of Medicine, Minoxidil Topical
- FDA, Drugs (minoxidil topical solution labeling)
- Price VH, N Engl J Med 1999, 'Treatment of hair loss'