
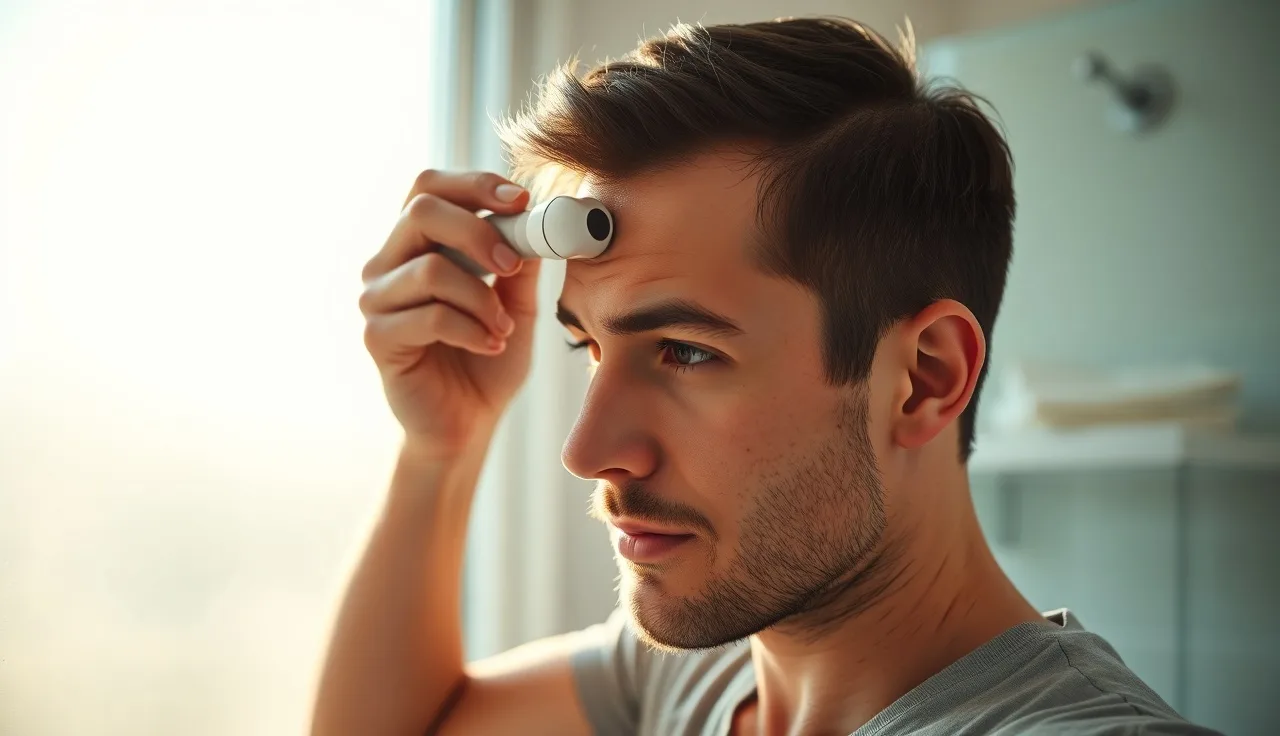
TL;DR: A home trichoscope (dermatoscope set to polarized mode, 10x-50x) lets you examine hair shaft diameter, follicle density, and scalp signs like perifollicular scaling or yellow dots. Clip the hair to 1-2 mm, press firmly without bubbles, and photograph the same four zones each session. Patterns are clues, not diagnoses. Take your images to a dermatologist for interpretation.
What exactly is a trichoscope, and how is it different from a regular dermatoscope?
A trichoscope is just a dermatoscope pointed at the scalp and hair follicles instead of skin lesions. There is no separate device category. Any polarized-light dermatoscope works as a trichoscope once you know which scalp patterns to look for.
Dermatoscopes come in two illumination types: non-polarized (requires immersion fluid to cancel surface glare) and polarized (works dry, penetrates deeper into the skin). For scalp work at home, polarized is more practical. You skip the gel, the cleanup is easier, and polarized light shows perifollicular structures more clearly than non-polarized light in most published trichoscopy studies [1].
Magnification matters too. Consumer devices marketed as "digital hair analyzers" often claim 200x-1000x, which sounds impressive but is actually too high for practical trichoscopy. Dermatologists use 10x-70x in clinical practice; 20x-50x is the sweet spot for seeing follicle groups, shaft diameter variation, and scalp surface features at the same time [2]. If your device only shows individual hair shafts and nothing else, the magnification is too high.
Handheld optical dermatoscopes (the kind that attach to a smartphone camera) start around $30-80. Purpose-built digital trichoscopes with built-in cameras and software run $150-600 for consumer models, and clinical-grade systems cost several thousand dollars. The cheap optical attachment on your phone, used correctly, gives you genuinely useful information.
What can a home trichoscopy session actually tell you?
Trichoscopy reveals several things a mirror and good lighting cannot. Hair shaft diameter variability is the big one. In androgenetic alopecia (the most common form of hair loss in both men and women), follicles miniaturize over time, so you end up with a mix of thick terminal hairs and thin vellus-like hairs in the same zone. A ratio of more than 20% of hairs below roughly 0.03 mm in diameter is associated with androgenetic alopecia in the literature, though measuring shaft diameter precisely at home is difficult without calibrated software [2].
Yellow dots are another key finding. They are dilated, sebum-filled follicular openings and appear as yellow or yellowish-white pinpoint structures. They show up strongly in alopecia areata, where the follicle is present but the hair has fallen out or been rejected [3].
Perifollicular scaling (white or gray flakes tightly attached around the hair follicle opening) suggests inflammation, often seen in lichen planopilaris or discoid lupus. Loose white flaking that drifts around the surface of the scalp is more consistent with dandruff or seborrheic dermatitis.
Black dots (also called "cadaverized hairs") are broken hairs at the scalp surface and can indicate alopecia areata or trichotillomania. Exclamation mark hairs, which taper narrower at the base than at the tip, are a classic active-phase alopecia areata sign.
Here is what trichoscopy cannot do at home. It cannot confirm a diagnosis. It cannot distinguish between two conditions that share similar patterns. It cannot replace a biopsy. Think of it like a good blood pressure cuff: real data that helps you and your doctor have a better conversation, not a treatment decision on its own.
What equipment do you actually need to get started?
At minimum: a polarized dermatoscope, a smartphone with a decent camera, and good lighting. A simple phone attachment dermatoscope (the kind with a lens that clips over your phone camera) runs $30-80 on Amazon and works fine for learning. The DermLite DL4 is a commonly cited clinical benchmark; the $200-300 range consumer polarized options from brands like Firefly or Heine Pocket reach closer to clinical image quality.
If you want to track change over time, a digital trichoscope with built-in image capture and grid overlay is genuinely helpful. Some include software that measures average shaft diameter. Expect to pay $150-500 for this category of device.
You will also need: a fine-tooth comb (to part the hair clearly), good ambient lighting or a ring light, a scalp ruler or printed grid (to mark the same zones across sessions), and a folder or app to store dated images.
Immersion fluid (isopropyl alcohol or ultrasound gel) is only necessary for non-polarized modes. Skip it with polarized.
One honest note on "AI hair analyzers" sold online: many of them run basic image filters, not validated diagnostic algorithms. The images they capture are useful; the "analysis" output is often marketing. Use them as cameras, evaluate the images yourself using the patterns described in this article, and let a dermatologist do the interpretation.
How do you prepare your scalp before a trichoscopy session?
Wash your scalp 24 hours before, not the same day. A freshly washed scalp can look artificially clean, masking scaling or sebum patterns. A scalp washed the day before is in a more representative baseline state.
Do not apply styling products, serums, or topical minoxidil within 12 hours of your session. These leave residue that scatters light and makes follicular openings harder to read.
If your hair is longer than about 2-3 cm in the area you want to examine, you have two options: part it firmly and use a comb to hold the hair back, or clip it short (1-2 mm) in the examination zone. Short hair gives much cleaner images. Clipping a small test zone for tracking purposes is what many dermatologists recommend for serial home monitoring.
For people using minoxidil for men or other topical treatments, trichoscopy sessions spaced 3-6 months apart (under the same prep conditions) can help you visually track whether follicle density or shaft diameter is changing. That is one of the most practical home uses: not diagnosis, but monitoring a treatment you are already on.
What is the step-by-step process for a home trichoscopy session?
Step 1: Set up your environment. Sit near a window with natural light, or use a ring light. Lay out your dermatoscope, phone, comb, and a printed reference grid.
Step 2: Define your four examination zones. Researchers and dermatologists consistently examine the frontal hairline (2 cm behind the hairline midpoint), the mid-scalp (top of the crown), the vertex (the very top center), and the occipital scalp (back of the head). The occipital zone acts as a control area in androgenetic alopecia because it is usually the last to be affected in men and in many women [2].
Step 3: Part the hair and expose the scalp surface. Use a fine comb and your non-dominant hand. For each zone, you want to see roughly a 1 cm x 1 cm patch of scalp clearly.
Step 4: Press the dermatoscope lens flat against the scalp. Apply firm, even pressure. Air bubbles between the lens and scalp scatter light and produce blurry images. If you see white glare patches, press harder or reposition.
Step 5: Capture 3-5 images per zone. Focus and refocus between shots. The scalp surface moves slightly with each breath; multiple shots give you at least one sharp image per zone.
Step 6: Label and store every image immediately with the date and zone name. A simple naming convention works: 2025-07-11_frontal, 2025-07-11_vertex, etc.
Step 7: Review the images at 100% zoom on a computer screen, not your phone. Phone screens are too small to catch subtle findings.
Step 8: Compare current images to previous sessions. Change over time tells you more than any single snapshot.
What trichoscopy patterns are associated with common types of hair loss?
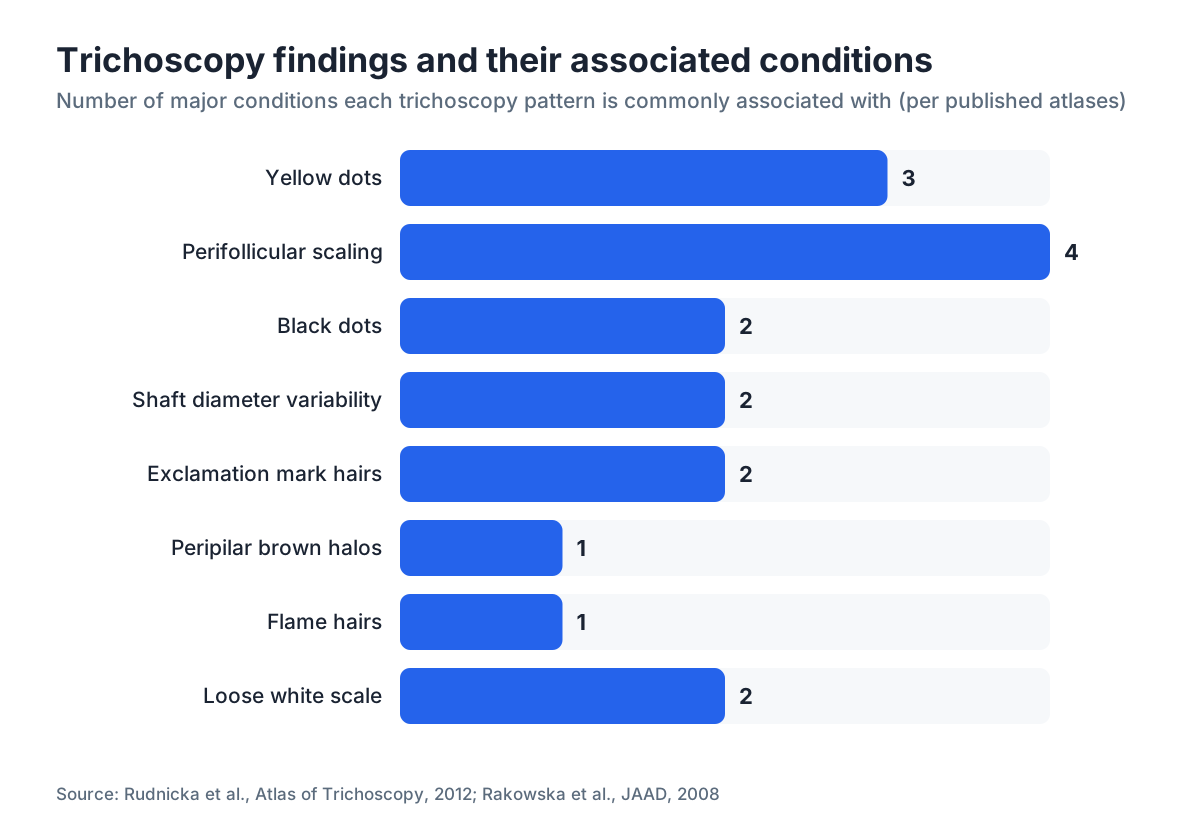
The table below summarizes major patterns from published trichoscopy literature [1][2][3]. These are associations, not proof of a diagnosis.
| Pattern | Typical appearance | Conditions commonly associated |
|---|---|---|
| Yellow dots | Yellow/yellowish-white pinpoints at follicle openings | Alopecia areata, androgenetic alopecia |
| Black dots (cadaverized hairs) | Dark specks at scalp surface | Active alopecia areata, trichotillomania |
| Exclamation mark hairs | Hairs narrower at the base than the tip | Active alopecia areata |
| Peripilar sign (brown halos) | Brown rings around follicle openings | Androgenetic alopecia, early stages |
| Perifollicular scaling (white) | Tight white scale around follicle | Lichen planopilaris, discoid lupus |
| Loose white scale | Diffuse flaking, easily displaced | Seborrheic dermatitis, psoriasis |
| Flame hairs | Wavy, translucent proximal hair remnants | Active alopecia areata |
| Hair shaft diameter variability | Mix of thick and thin hairs in same zone | Androgenetic alopecia |
| Honeycomb pigment pattern | Irregular brown lattice on scalp surface | Normal tanned scalp, also tinea capitis |
| Broken hairs at varying lengths | Hairs snapped at different heights | Trichotillomania, tinea capitis |
Androgenetic alopecia, the condition behind most receding hairlines in men and diffuse thinning in women, shows a characteristic combination: peripilar brown halos, shaft diameter variability greater than 20%, and yellow dots in affected zones, with the occipital zone appearing relatively normal by comparison [2].
Telogen effluvium, which causes diffuse shedding after stress, illness, or hormonal shifts, does not show the dramatic follicle changes you see in androgenetic alopecia. Trichoscopy in active telogen effluvium typically shows mostly normal-diameter hairs, an increased proportion of empty follicular openings, and upright regrowing hairs (short, thin hairs pointing straight up). The overall picture can look surprisingly normal, which is a reassuring sign that the follicles are intact.
How often should you do a home trichoscopy session to track hair loss?
Once every three months is a reasonable starting frequency for most people monitoring a known condition or a treatment. Monthly is too often because the changes you are looking for (shaft diameter shifts, density changes) happen slowly; comparing images 30 days apart mostly produces anxiety without signal.
If you are tracking a specific treatment, like finasteride or minoxidil or a combination of finasteride and minoxidil, baseline images before you start are the most important ones. Take them before your first dose, then at 3, 6, and 12 months. Most randomized trials measure outcomes at 12-24 months because that is when meaningful follicle-level changes accumulate [4].
Consistency beats frequency. Same lighting, same zones, same prep, same device settings. A set of six consistent images over 18 months tells you far more than 20 images taken under different conditions.
Can home trichoscopy replace a dermatologist?
No. And this is not a legal disclaimer; it is the practical reality of what the tool can and cannot do.
A trained dermatologist using trichoscopy in a clinical setting has three advantages over a home user: calibrated equipment with validated software, pattern recognition built from thousands of cases, and the ability to follow up an ambiguous finding with a biopsy, blood work, or a dermoscopy-guided punch biopsy on the same visit.
The American Academy of Dermatology recommends seeing a board-certified dermatologist for any hair loss evaluation, noting that "the cause of hair loss is not always obvious, even to a trained professional." [5] If you see perifollicular scaling, black dots, or any pattern that looks inflammatory, that warrants a real appointment, not self-diagnosis.
Home trichoscopy earns its keep in a different role: helping you document what is happening, giving you better questions to bring to your appointment, and monitoring the slow changes a twice-yearly dermatologist visit might miss. Think of it as the patient's side of the same conversation.
If you want a faster way to get initial signal before committing to a dermatologist appointment, the free AI scan at MyHairline analyzes a photo of your scalp and hairline against common loss patterns, which can help you decide whether your findings look like normal variation or something to pursue further.
What are the limitations and risks of interpreting trichoscopy images yourself?
Pattern overlap is the biggest problem. Multiple conditions share the same trichoscopy signs. Yellow dots appear in both alopecia areata and androgenetic alopecia. Perifollicular scaling appears in lichen planopilaris, discoid lupus, and folliculitis decalvans. Without the clinical context (your history, the distribution of loss, any associated symptoms), a pattern is ambiguous.
Confirmation bias is real. If you are convinced you have androgenetic alopecia based on a relative's pattern, you will see the peripilar sign everywhere, including on a normal scalp. Having a family member or partner review your images helps.
Image quality failures are common for beginners. Motion blur, poor focus, or pressing unevenly against the scalp produces images that look abnormal when the scalp is fine. If a finding appears in only one of your five shots from a zone, it is probably an artifact.
Over-interpretation causes harm. Reading about alopecia areata and then deciding you have it based on one yellow dot is a path toward unnecessary anxiety and possibly unnecessary treatment. The causes of hair loss are genuinely varied, and the difference between conditions matters for treatment.
Home trichoscopy also cannot catch systemic causes. Iron deficiency, thyroid dysfunction, and nutritional deficiencies can cause significant hair loss with a relatively normal trichoscopy image. If you are shedding heavily but your images look clean, blood work is the next step, not a better camera.
How should you store and share your trichoscopy images with a doctor?
Store images in a folder organized by date, not by zone. Chronological order makes it easy to scroll through and see change. A free tool like Google Photos with automatic date sorting works fine.
When you bring images to a dermatologist, share them in original resolution. Do not screenshot your screenshots. Export from your dermatoscope app or camera app and send the original files. Compression destroys the fine detail that makes trichoscopy useful.
Create a one-page summary for your appointment: date of session, prep conditions, device used, and the specific changes you noticed compared to previous sessions. "I think I see more shaft diameter variability in the vertex zone compared to six months ago" is useful information. "My hair is getting worse" is not.
If your dermatologist uses a specific teledermatology platform, upload images there before your appointment so they can review prior to seeing you. Several academic medical centers now accept trichoscopy images uploaded in advance as part of a structured hair loss consultation.
Does the type of trichoscope you buy make a significant difference in results?
For learning the basics and monitoring over time, a $50-80 polarized smartphone attachment gives you genuinely useful images. The limiting factor at this price point is usually your technique, not the optics.
For serious serial monitoring or sharing images with a dermatologist for remote review, a $200-500 digital device with consistent magnification settings and a built-in scale bar is worth the upgrade. The scale bar matters because it lets you (and your doctor) reference measurements across sessions.
Above $500 in the consumer segment, you are mostly paying for software features, not optical quality. Clinical devices ($3,000-15,000) are in a different category because of calibrated sensors, validated measurement algorithms, and integration with electronic health records, none of which you need at home.
One feature that genuinely helps home users: a fixed focal length. Variable zoom makes it easy to accidentally compare a 20x image from January to a 40x image from June and conclude your follicles have grown. Fixed magnification (or the discipline to always set the same magnification) matters more than resolution.
For those already tracking hair loss and considering treatments beyond monitoring, understanding DHT blockers and hair loss supplements alongside your trichoscopy findings gives you a fuller picture of your options.
When do home trichoscopy findings mean you should see a doctor urgently?
Some patterns should prompt you to make an appointment within a few weeks, not in six months.
Perifollicular scaling that is pink or red, not white: this can indicate active scarring alopecia (lichen planopilaris, frontal fibrosing alopecia). Scarring alopecias destroy follicles permanently. Early treatment slows the process; delay matters here more than in androgenetic alopecia.
Rapid change over 4-6 weeks: if your images from last month and this month show a dramatic increase in empty follicular openings or yellow dots, something acutely changed. That warrants investigation, not watchful waiting.
Scalp pain, burning, or tenderness accompanying any trichoscopy finding: inflammatory conditions often have symptoms before they have visible clinical signs. Pain with perifollicular changes is a combination to take seriously.
Any finding you cannot identify: if you are looking at something in your images that does not match any of the common patterns described in this article, do not force it into a category. Take it to a professional.
Here is the stakes-setting fact: the earlier you catch and treat a condition like frontal fibrosing alopecia or lichen planopilaris, the better the outcome. These are not the same as androgenetic alopecia, and they do not respond to the same treatments. A hair transplant on an actively scarring scalp, for example, is not appropriate and can worsen the outcome.
Sources
- Journal of the American Academy of Dermatology, Rakowska et al. 2008 - Trichoscopy: a new tool for diagnosing hair and scalp diseases
- International Journal of Dermatology, Rudnicka et al. 2012 - Atlas of Trichoscopy
- Dermatology Practical and Conceptual, Mubki et al. 2014 - Evaluation and diagnosis of the hair loss patient
- Journal of the American Academy of Dermatology, Kaufman et al. 1998 - Finasteride in the treatment of men with androgenetic alopecia
- American Academy of Dermatology Association - Hair Loss: Who Gets It and Causes
- JAMA Dermatology, Tosti et al. 2009 - Dermoscopy of hair and scalp disorders
- FDA - MedWatch, Propecia (finasteride) prescribing information
- National Institutes of Health, National Library of Medicine - Trichoscopy as a Diagnostic Tool in Trichotillomania and Alopecia Areata (PMCID PMC4171880)
- American Academy of Dermatology Association - Alopecia Areata: Diagnosis and Treatment
- Journal of Clinical and Aesthetic Dermatology, Harries et al. 2019 - Lichen planopilaris: current understanding of pathogenesis and treatment
- Skin Appendage Disorders, Verzegnassi et al. 2020 - Digital dermatoscopy for scalp evaluation